
Decal Material Blending ('gira style')
note: for this tutorial I'll assume you have basic knowledge of Blender modeling/mapping techniques as well as basic knowledge of photoshop (or any other good 2d software).
If you look around the terrains in Uru one thing that might strike you is how great the mapping is. Look at the ground in Relto, it is just totally seamless, several textures of grass and rock blending into each other perfectly. That's because the Cyan guys used a technique we cannot do as of now. So let's get a look at another Age: Eder Gira. Again look at the ground and you'll notice the area where the 'walls' and the ground meet. This technique uses alpha blending and decals, two things we can do easily with Blender and any good 2d graphic software. It allows to have two separate meshes for the ground and the wall with different textures and different mapping and yet blend them easily. While it will not cover every case in complex meshes it will lead to great results in most cases with not a whole lot of work.
Essentially what we will do is create our object as a single continous mesh, and then separate it in three meshes, one for the 'sides', one for the 'top' and one for the 'decal' mesh that will overlay both other meshes. (a decal is a polygon that is layered on top of another polygon to add another texture; used for instance on the City ground for the cracks or on Kemo's walls for the drawings). We will need three textures, two for our main meshes and one that you will have to create yourself. So let's create a nice little rock and cover its top with grass.
Let's rock
1) Add a UVsphere to your scene (segments: 16; rings: 6) and in edit mode select the bottom half of the vertices
2) Remove them to have half a sphere; now select the lowest row of vertices and
3) extrude them down a bit.
It's not the greatest rock ever created but it'll do for our tutorial.
Let's cut it out
Let's look at how to get those three meshes we need:
1) Deselect everything if you hadn't done it and now select the three bottom rows of vertices. Duplicate them (Shift-D) (do not move the mouse while duplicating) and separate them from the mesh (P). Exit edit mode, select your new mesh and name it 'Rock_Lower'.
2) Go back to your original mesh, deselect everything and repeat the same operation with the 3 upper rows of vertices. Name your new mesh 'Rock_Upper'.
3) Finally go back again to the original mesh, and this time select the 3 middle rows of the mesh and repeat the operation. This will be named 'Rock_xDecal' (yes, 'xblending' with a X; we'll see bellow why it's important). As you can see it is essentially a 'ribbon' that goes all along over the cut between the two meshes. You can now delete your original mesh.
Important : The Decal mesh will need to be on top of the two others, or else in-game it will not be displayed (of course). Right now since we have just extracted the 3 meshes from our original sphere whithout moving them they are all in the exact same position and should display some bad visual artifacts in-game (textures flickering or 'zebraing'). BUT due to a wonderfull quirk of the PRP plugin the mesh with the last name in the alphabetical order will be drawn on top in-game. That is why our blending mesh is named 'Xdecal' (we could have named it Y or Z though). If for some reason this doesn't work, here is a second solution : take your blending mesh, select all its vertices and press Alt-S; that's the ever usefull 'shrink/fatten' tool. Enlarge your mesh by a very small amount (0.02) and that will work.
We now have our two base meshes and the decal one. Now just a couple important things I haven't emphasized yet :
- it's usually better to have quads rather than triangles on your mesh, it will make mapping easier an cleaner.
- you can notice that the decal mesh overlay each other mesh by a 'row' of faces, actually it can be any number of row of faces as long as the mesh can be UV mapped easily (ie: cylindrical mapping)
Let's draw some stuff
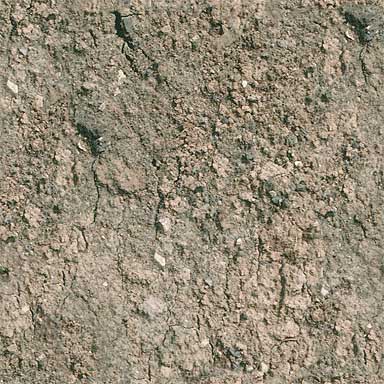
Now that we've done so much hard 3d modelling let's take a break and switch to 2d. You'll need two textures (here are those I used : rock.jpg - 87ko, and grass.jpg - 62ko) and you will need to create the texture for the decal mesh yourself. (here is the one I created for this scene - 480ko). The 3 textures can be of different sizes, it doesn't matter; just make sure that the mapping on your meshes have them stretched equally so that in-game one doesn't look much more detailed or smaller than the other.
Since this is not a tutorial about photoshop we'll make this short and see the easiest technique.
Open Photoshop and bring in your 'grass' texture. Double clic the 'background' layer in your 'layers' palette (that's your only layer right now) and rename it to 'grass' (this is just to change your background into an actual layer). Create a new layer (this button ![]() ), fill it with black and move it bellow your grass layer.
), fill it with black and move it bellow your grass layer.
Pick you grass layer again and select roughly one third of your image and feather it (ctrl-alt-D) by 30 pixels or so (if photoshop complains that it won't feather over 16 pixels, feather it a second time) With that soft selection created you can now add a layer mask to your layer (this button ![]() ). 'Ctrl-click' you layer mask and go to your 'channels' palette. Click the 'save selection as channel' button (
). 'Ctrl-click' you layer mask and go to your 'channels' palette. Click the 'save selection as channel' button ( ![]() )
)

You can save your new texture as a TGA file, name it 'useAlpha_rockOverlay' (so it is exported correctly) , make sure the 'Alpha channels' option is checked, select 32bits/pixels and you're done. Back to Blender.
Let's UVmap the heck out of these
1) Select your Lower and Upper meshes and UV map them as you wish with your two textures. Do not forget to assign them two new separate materials or textures might not show up in Uru.
2) Select your xDecal mesh and map it cylindrically with your Overlay texture. (your texture won't appear transparent in Blender, that's normal) Make sure your mapping is very linear, and regular; that's where a mesh with quads is easier to work with. Also make sure it doesn't tile vertically.
3) There, we're almost finished now.
Tip : To make your map appear transparent in Blender go to 'UV select mode' (F), select any face, in the 'editing' panel go to the 'Texture face' tab, click 'Alpha', select all your faces (A) and click 'Copy Draw Mode'.
Let's pray that it works
Last steps, put this into an Age, export it to Uru, link, and hope for the best. :)
(to import an object from another blender file into an Age, open your Age, and go to menu > File > Append (Shift-F1). then choose your file and go to 'Object'.)
While this technique can be used for more complex meshes the issues then lies in the mapping of the overlay mesh, Blender's UV tools might not be enough for complex work. Look at some of Gira's meshes.. eek! I wouldn't want to UV map this with Blender....